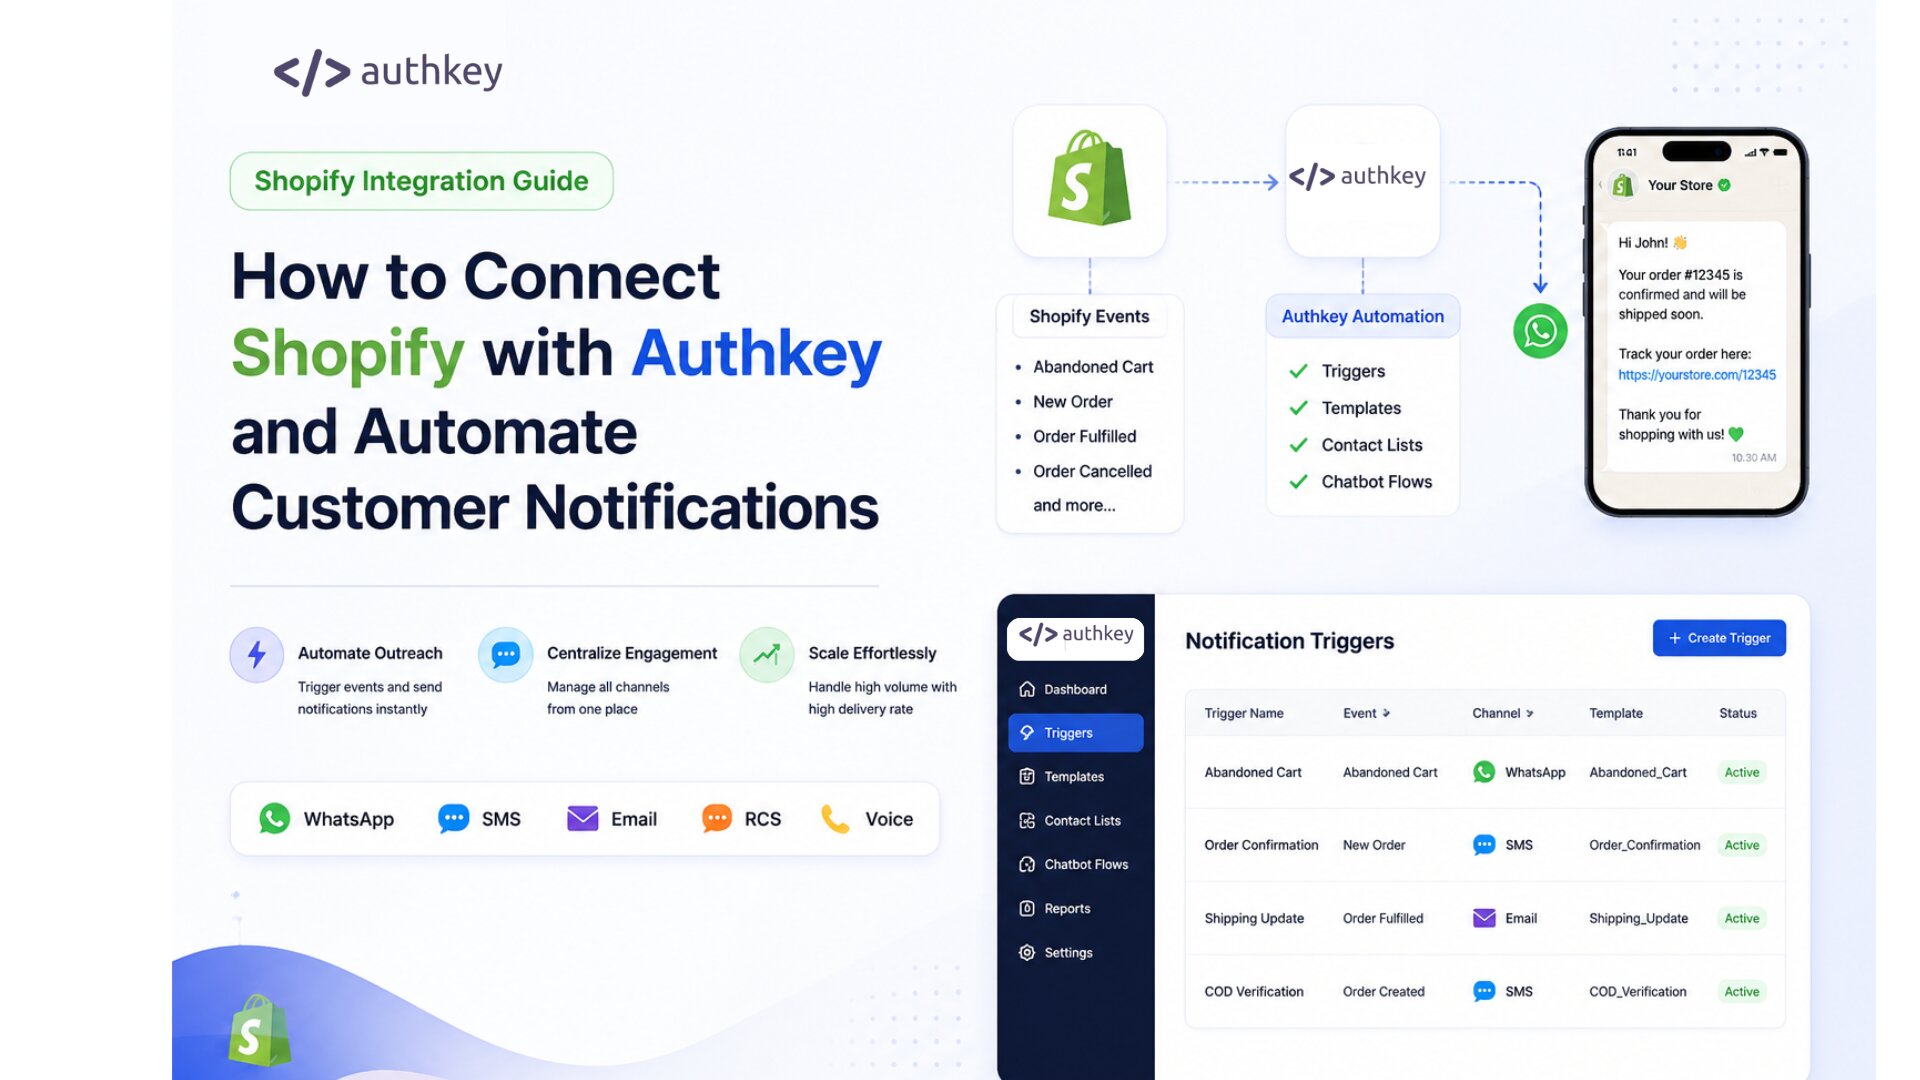
Integrate your Shopify store with authkey to automate customer communication across WhatsApp, SMS, Email, RCS, and Voice channels. Trigger notifications based on store events, engage customers automatically, and manage all communication channels from a single platform.
Why Connect Shopify with Authkey?
Authkey helps Shopify merchants automate customer communication throughout the buying journey.
Automate Outreach
Automatically trigger notifications when important events occur in your Shopify store, such as:
- Abandoned Cart
- New Order Created
- Order Fulfilled
- Order Cancelled
- Shipment Updates
- Customer Registration
Send notifications instantly through your preferred communication channel.
Centralize Customer Engagement
Manage all customer communication from a single platform.
Instead of using multiple vendors for WhatsApp, SMS, Email, and RCS, Authkey allows you to manage everything from one dashboard.
Before You Begin
If you are a new Authkey user, complete the following setup before connecting Shopify.
Step 1: Create an Authkey Account
Sign up and complete onboarding on the authkey console.
Step 2: Configure Communication Channels
Set up the channels you want to use:
- WhatsApp Business API
- SMS
- RCS
- Voice
Step 3: Create Message Templates
Create and approve the templates that will be used for Shopify notifications.
Examples:
- Order Confirmation
- Abandoned Cart Reminder
- Shipment Update
- COD Verification
- Review Request
Once your channels and templates are ready, proceed with the Shopify integration setup.
Step-by-Step Shopify Setup Guide
Step 1: Install the Authkey Shopify App
Install the Authkey app from the Shopify App Store. Click here to get the app
After installation, open your Shopify Admin Panel and locate Authkey from the Apps section.
Step 2: Log in to Your Authkey Account
Click on the Authkey app inside Shopify.
Enter your Authkey credentials and log in.
After successful authentication, you will be redirected to the Authkey Shopify dashboard.
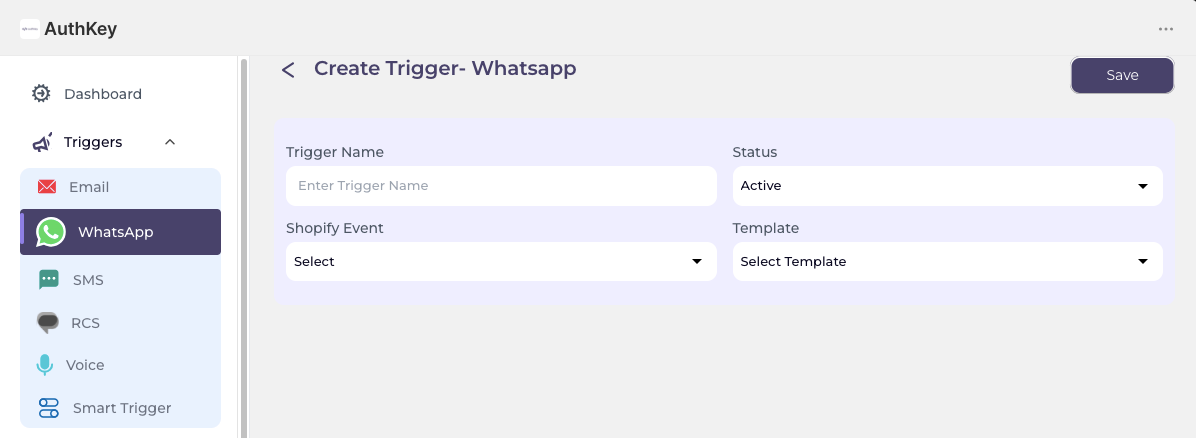
Step 3: Configure Notification Triggers
Triggers define when notifications should be sent.
To create a trigger:
- Open the Triggers section.
- Click Create Trigger.
- Enter a trigger name.
- Select the communication channel.
- Choose the Shopify event.
- Select the message template.
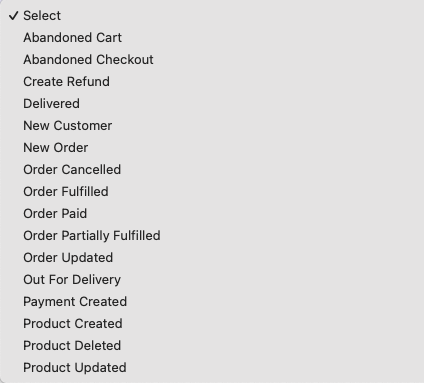
Supported Events
Supported Channels
- SMS
- RCS
- Voice
Step 4: Map Template Variables
After selecting a template, map the template variables with Shopify data fields.
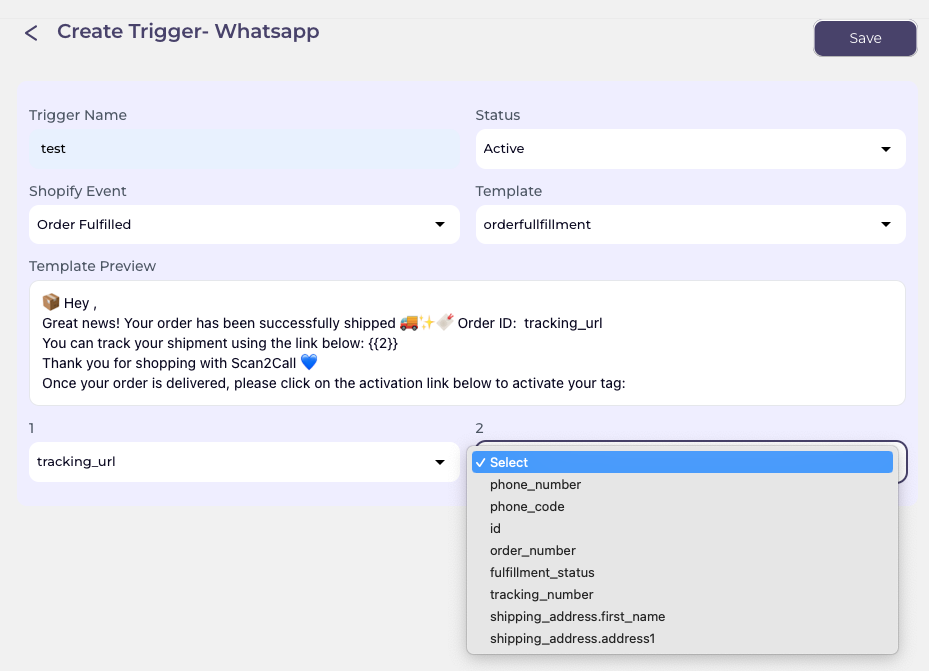
Example:
| Template Variable | Shopify Field |
| {{1}} | Customer Name |
| {{2}} | Order Number |
| {{3}} | Product Title |
| {{4}} | Tracking URL |
Ensure all variables are mapped correctly before proceeding.
Step 5: Save the Trigger
Click Save Trigger to activate the automation.
Repeat the process for additional events and communication channels as required.
Going Live
Once testing is complete:
- Activate all required triggers
- Verify templates
- Monitor delivery reports
- Track customer engagement
Your Shopify store is now ready to automatically send notifications and engage customers using Authkey.
Need Help?
If you face any issues during setup, contact the Authkey support team for assistance with installation, channel configuration, templates, or webhook setup.