Want to use WhatsApp to connect with your customers? With Authkey, you can get started quickly and easily. You can effortlessly Embedded Sign Up for the WhatsApp Business API and have your business ready to engage with customers in just 10 minutes!
This guide walks you through the simple onboarding process step-by-step.
Step 1: Sign Up on Authkey
Visit the authkey.io website and create an account.
Step 2: Start WhatsApp Onboarding
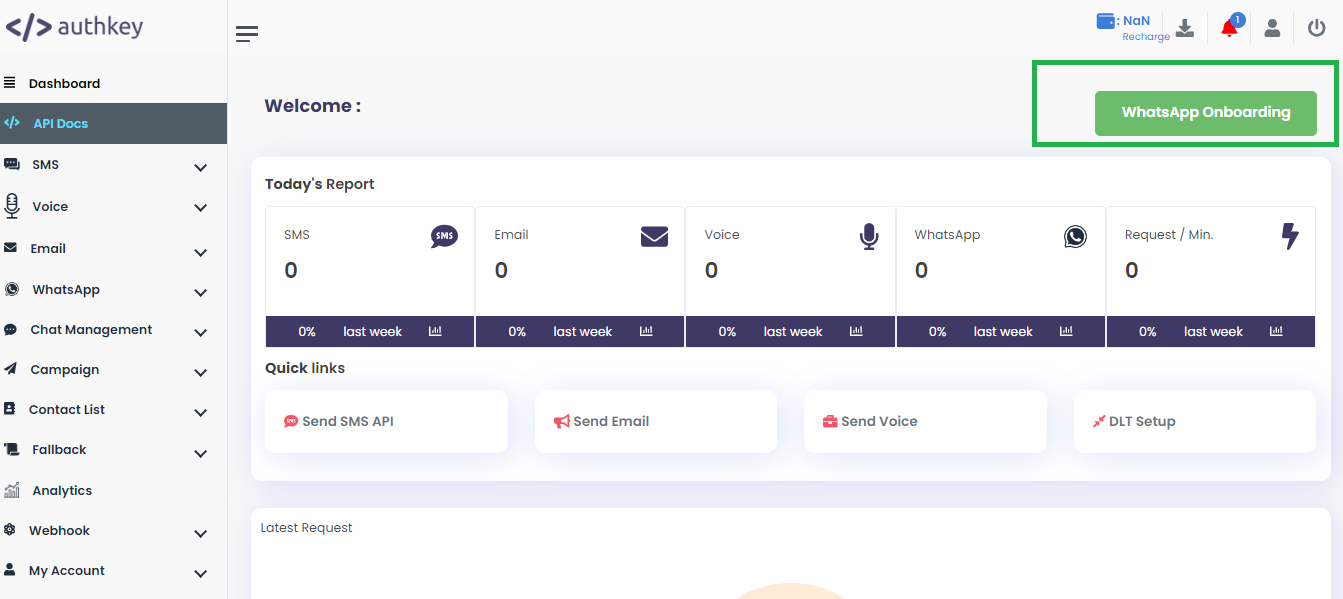
Once you’re logged in to your Authkey account, proceed to initiate the WhatsApp onboarding process.
Simply navigate to the upper right corner of your dashboard and click the green “WhatsApp Onboarding” button.
Next, you’ll begin the WhatsApp onboarding process by providing your business information.
Fill in the required fields:
- Company Name: Enter your registered company name.
- Proposed WhatsApp Number: Input the phone number you wish to use for WhatsApp communication.
- Business Website: Provide your company’s website URL.
- Business Email: Enter a valid business email address.

Once all the information is correctly filled out, click “Request Now” to proceed to the next step: connecting your WhatsApp account via Facebook.
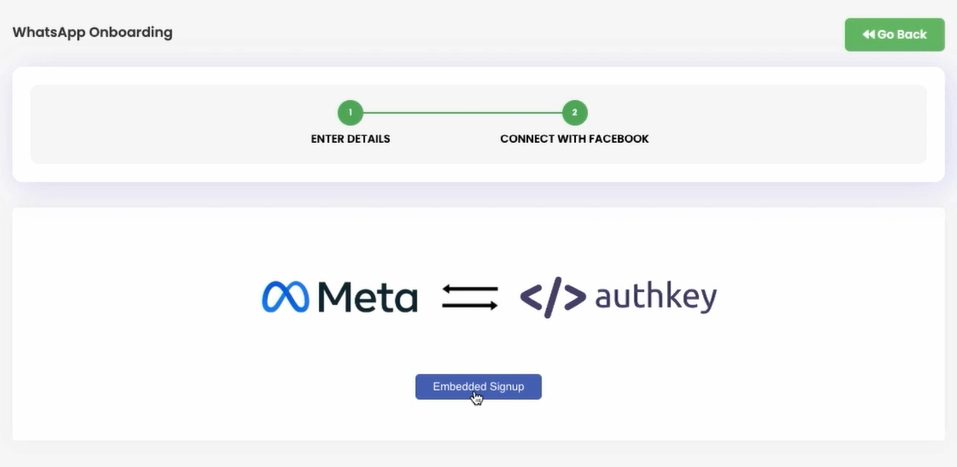
Step 3: Connect with Facebook Account -WhatsApp Embedded Signup
You will be redirected to the Meta onboarding page.
Click the “Embedded Signup” button to initiate the integration process.
- Login with your Facebook credentials. Ensure that this account is linked to your business’s Facebook page. This will connect Facebook Business Manager Account.
- Continue with the same Facebook account to complete the authentication process.
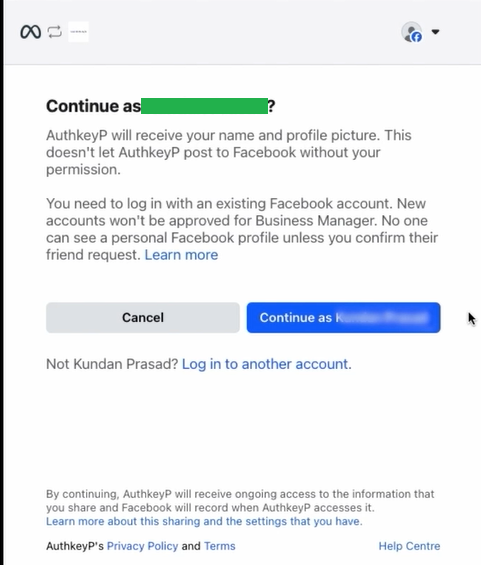
This step connects your business with Meta to enable WhatsApp Business messaging via Authkey.
- Connect your account to Datagen Internet Service Private Limited by selecting “Get Started.”
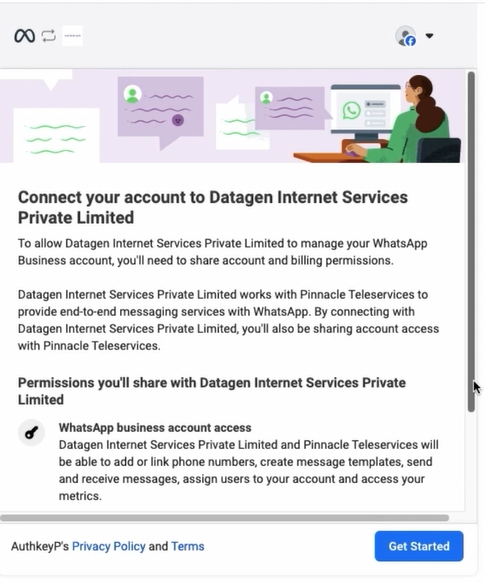
This seamless integration helps streamline your WhatsApp Business API setup.
Step 4: Complete Your Business Profile
After confirming your Facebook account, you’ll be prompted to enter your business details.
Complete the following fields:
Business Portfolio: Select an existing portfolio or create a new one.
- Business Name: Enter your official business name.
- Business Website or Profile Page: Add your business website URL or Facebook page.
- Country: This will be pre-filled based on your location, but ensure it is accurate.
- Address (Optional): You may include your physical business address if applicable.
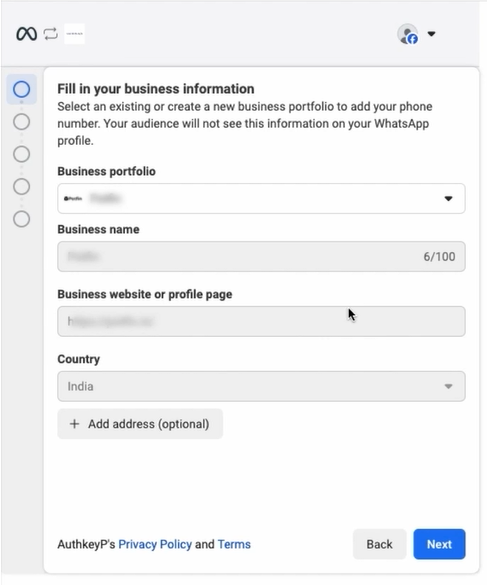
Once all required fields are filled, simply click “Next” to proceed.
Step 5: Set Up WhatsApp Business Profile
In this step, you’ll need to link your WhatsApp Business Account with your Meta business portfolio.
Follow these steps:
- Choose a WhatsApp Business Account: Select an existing account from the dropdown list. If you haven’t created one before, you may need to set it up first.
- Create or Select a WhatsApp Business Profile: Choose to create a new WhatsApp Business profile or select an existing one.
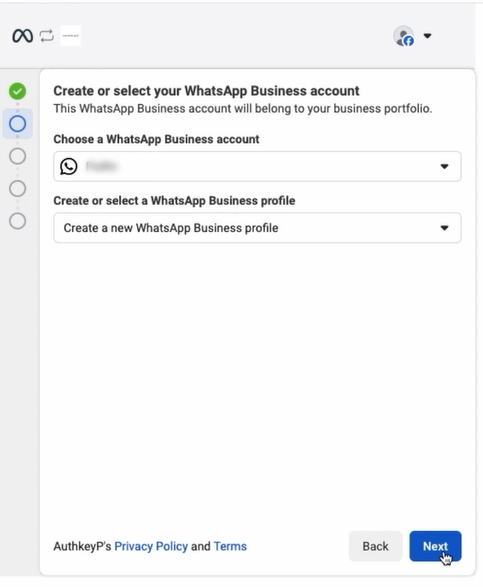
After making your selections, click the “Next” button to proceed.
Fill in the following details:
This step helps you set up your business profile, which will be visible to your customers on WhatsApp.
- WhatsApp Business Account Name: Enter the name of your business account. This name is for your internal reference.
- WhatsApp Business Display Name: This is the name your customers will see. It should closely match your actual business name and follow Meta’s display name guidelines.
- Category: Choose the business category that best represents what your business offers.
- (Optional) Click “Show more options” to enter additional details like your business description or email.
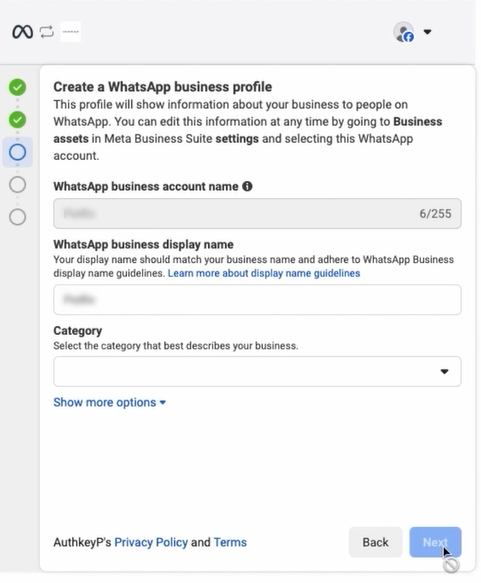
Once all the required fields are completed, click “Next” to continue.
Here’s what to do next:
- Enter your phone number:
- Is not currently linked to another WhatsApp Business API account.
- Can receive an SMS or voice call for verification.
- Choose your verification method
- Text message (SMS)
- Phone call
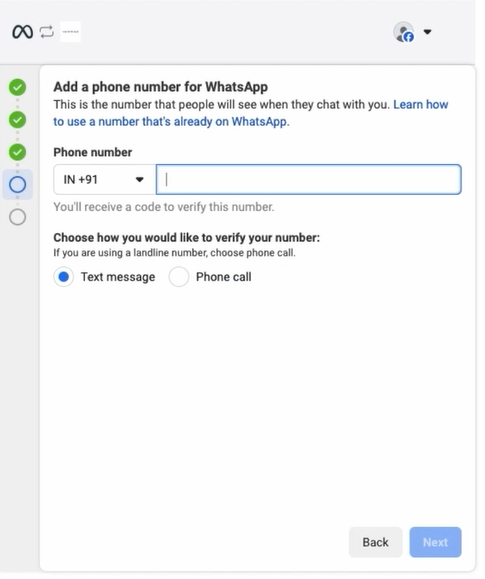
You will receive a verification code based on the method selected. Click “Next” to proceed to verification.
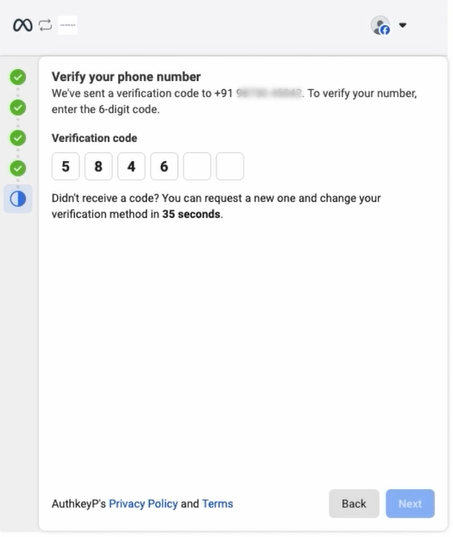
To complete the WhatsApp Business setup, you must verify the phone number entered in the previous step.
You’ll receive a 6-digit verification code via the method you selected (SMS or call).
Click “Next” to proceed after entering the correct code.
Step 6: You’re Ready to Send!
Congratulations! You’ve completed the onboarding process and are now ready to engage with customers on WhatsApp. With your account set up, you can automate notifications, provide customer support, and boost engagement instantly.
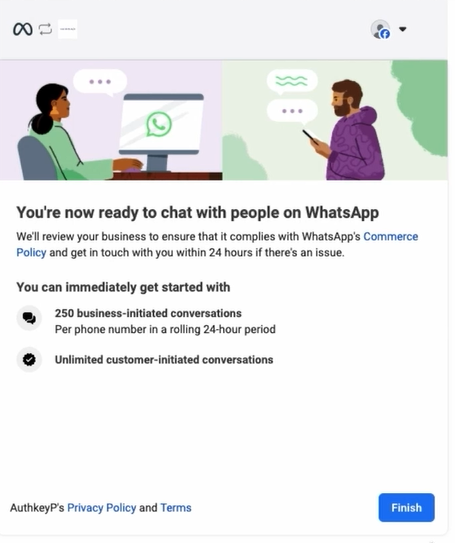
Meta will review your business to ensure it complies with WhatsApp’s Commerce Policy.
Once the onboarding process is complete, all the WhatsApp Business account details will be displayed in the table below.
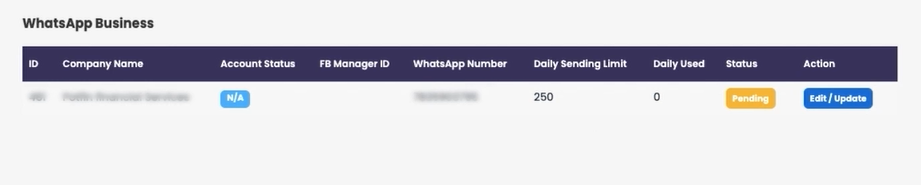
- Account Status will initially show as Pending and will automatically update to Approved once Meta completes the review.
- A daily sending limit of 250 business-initiated messages is set by Meta and is free of cost.
- You can click the Edit/Update button to make changes to the WhatsApp business profile or settings.
You’ll see the Edit and Update page in two cases-
- After completing onboarding, if you wish to edit or update any information.
- If you left during onboarding after step 3, revisit the WhatsApp Business table, click “Edit/Update”, and complete the onboarding process.
Conclusion
Onboarding with Authkey for WhatsApp Business is a breeze, taking only 10 minutes from start to finish. There’s no hassle, no waiting—just a straightforward setup.
Get started now with Authkey and experience the power of WhatsApp Business at your fingertips!
#WhatsappOnboardingProcess #WhatsAppEmbeddedSignup #WhatsAppBusinessAPI